


There are plenty of note-taking methods on the internet. How do you choose the best one? Are you going to try all of them? Unfortunately, that’s going take a lot of time and leave you with a bunch of messy notes. So why not use one that’s simple and reliable?
In this guide, I’m going to show you a simple and effective note-taking method that will help you understand the notes you take. Let’s talk about the method.
What this method accomplishes
I call this note-taking method the One Shot Method. Why? Because it allows you to:
- Take the right kinds of notes so you don’t have to go back and revise them
- Take down notes quickly so that your hands and wrists don’t cramp
- Quickly scan through your notes and have a clear understanding of what you’re studying
- Easily understand the notes you’ve written down, making it a lot easier to study
So now that you understand what this note-taking method accomplishes, let’s go through the steps:
- Invest in an electronic note-taking device
- Listen and only type out keywords
- Always create a list of steps if you can
- Organize your notes to be easily scanned and digestible
1. Invest in an electronic note-taking device

Taking down notes using an electronic device is the most important step for this note-taking method. In my opinion, when it comes to taking notes, there are far more benefits to using something like a laptop compared to traditional hand and paper. Here are a few:
- You can type faster than you can write
- Editing and revising is easier a lot easier
- With all of the available software out there, taking notes electronically is a lot more convenient. You can use one service such as Google Docs or OneNote to automatically store, update, organize, and access your notes.
- You can highlight key points with the press of a button (bold, underline, or highlight button)
- Your work will never get damaged if you use one of the services I mentioned above. You can easily spill liquids on your paper notes and accidentally rip them up.
- Finding specific notes is very easy and fast to do. You can use the ctrl+F function or create headings which will allow you to jump to them (with most note-taking software)
As you can see, note-taking on electronic devices is a lot more convenient and efficient. You don’t need to invest in something expensive either, a simple laptop, tablet, or even smartphone will do. I’m going to replace the word “write” with “type” for the remainder of this guide.
2. Listen and only type out keywords
Whatever source you’re listening to, whether it be your professor or a video, only type down the keywords you hear. I give the following example in my Memorizing everything in college guide.
Let’s say your professor has on a PowerPoint or explains the definition of lead time as:
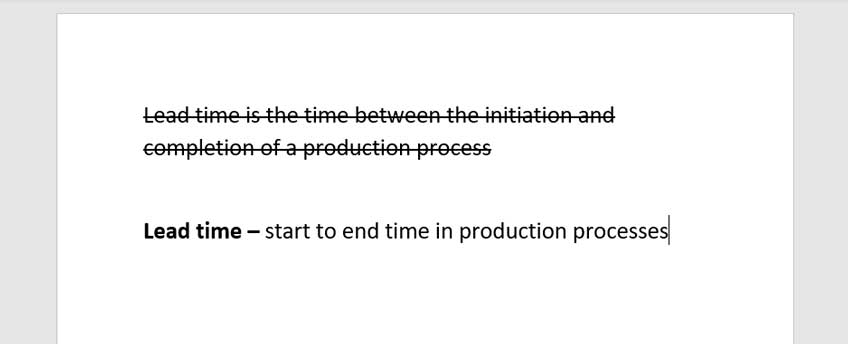
Lead time is the time between the initiation and completion of a production process (Google definition).
Instead of typing out the entire definition, only type the keywords that will allow you to understand the same definition. Take a moment to think about what you would type out.
…
Personally, I would type: Lead time – start to end time in production processes.
This definition is a lot shorter, easier to say out loud and understand, and it took me half the time to type. Your notes should be so easy to understand that someone outside of your class should be able to comprehend it.
This note-taking method prevents you from typing out words that are completely unnecessary. If you make this a habit, I guarantee you’re going to have much fewer notes to study through at the end of your semester.
3. Always create a list of steps if you can
Whenever your professor teaches you something, see if you can get to the same answer using a list of steps. Doing this will allow you to look back at your notes and understand exactly how you got to the answer.
It doesn’t matter how difficult the concept was, try to create a list of steps while following step 2 of this guide. Let’s go through another example.

Here is the formula to calculate standard deviation. Imagine your professor writes this formula on the whiteboard and starts to explain how to solve it. Think about the number of words your professor would use to explain this formula. Khan Academy gives a great example to solve this formula using a list of steps:

As you can see, the instructions are very simple and easy to understand, as long as you understand the terms. When you look back at your notes, you’ll be able to quickly read through each step and solve the formula.
4. Organize your notes to be easily scanned and digestible
With any note-taking method, you’ll want to organize your notes to be easily scanned and digestible. This means being able to quickly skim through your notes and find specific things you’re looking for.
At the same time, because your notes only include keywords, you should be able to immediately understand the context of your notes. You can do this by incorporating the following:
- Creating hierarchies when necessary
- Adding titles, headings, and lists
- Using a navigation or bookmarking sidebar
1. Creating hierarchies wherever necessary

As you can see from the image, hierarchies allow you to understand what goes underneath what. This also makes it easy for your eyes to scan through and process the information.
If you look at the photo, you’ll see that the bottom level points explain what the middle level is. Because the middle level is underneath the top level, it means that it’s a component of it. I know I didn’t need to explain that, but I just wanted to make it very clear.
2. Adding titles, headings, and lists
Always add headings using the heading tool in note-taking services like Google Docs and Microsoft Word. I’ll talk about why in the next list point. You should add headings whenever you are introducing a new chapter, topic, idea, or concept.
Adding titles is important too. Whenever you add a table, graph, chart, or image, you need to add titles that explain what the graphic is about.
Lastly, you should always add lists and bullet points if you can. They are a lot easier on the eyes, at least compared to long sentences.
3. Using a navigation or bookmarking sidebar

As you create headings, they will automatically be added to a navigation or bookmarking sidebar in the note-taking services I mentioned earlier. If you’re using some other service or software, look around and see if there’s a sidebar. Search online if you have to.
These make it incredibly easy to jump to specific areas or topics in your notes. It’s exactly like creating a hierarchy, but for topics. The collapsing tool allows you to hide subheadings underneath the heading.
This means you can add as many subheadings as you want without having an overwhelmingly large sidebar.

I want to make it clear that you should incorporate headings as much as possible. You’ll be able to quickly scan through your notes and study specific topics that you’re not so familiar with.
Conclusion
If you follow the One Shot Method for taking notes, you’ll never look back at your notes and give up on studying. You’ll be able to effectively study the information you’ve typed and hopefully receive some amazing grades.
Be sure to check out my Most effective study guide to succeed in college.
If you know something that would make this method even more effective, make sure to leave a comment down below!
What did you think about this blog? Comment below! Also, subscribe to my newsletter for updates on new content, including videos on YouTube!